DIY Home Maintenance: 4 Essential Hacks to Prevent Costly Repairs Before Spring 2026
Anúncios
As the chill of winter begins to recede and the promise of warmer days looms, now is the opportune moment to turn your attention to DIY home maintenance. Proactive care is not just about keeping your home looking good; it’s about safeguarding your investment and preventing potentially catastrophic and expensive repairs down the line. Spring 2026 is just around the corner, and with a little effort and know-how, you can ensure your home is ready to face the elements, save money, and maintain its value. This comprehensive guide will walk you through four essential DIY home maintenance hacks that every homeowner should master before spring truly arrives.
Many homeowners often overlook the critical importance of regular home maintenance until a significant issue arises. This reactive approach can lead to hefty repair bills, unexpected inconveniences, and even long-term damage to your property. By embracing a proactive DIY home maintenance mindset, you empower yourself to identify and address minor problems before they escalate. Think of it as preventative medicine for your house. Just as you wouldn’t wait for your car to break down before getting an oil change, you shouldn’t wait for a leaky roof or a burst pipe to consider your home’s well-being.
Anúncios
The beauty of these DIY home maintenance hacks lies in their simplicity and effectiveness. You don’t need to be a seasoned contractor or possess an extensive toolkit to implement them. What you do need is a willingness to learn, a keen eye for detail, and a commitment to protecting your most valuable asset. From ensuring proper drainage to sealing up drafts, these tasks are designed to be manageable for the average homeowner, offering significant returns in terms of peace of mind and financial savings.
Before we dive into the specifics, it’s worth reiterating the financial benefits. A small investment of time and a few inexpensive materials now can literally save you thousands of dollars in the future. For example, a clogged gutter can lead to foundation damage, roof rot, and even basement flooding – all repairs that are far more costly than simply cleaning out debris. Similarly, neglecting your HVAC system can lead to reduced efficiency, higher energy bills, and premature system failure. These DIY home maintenance tips are not just about fixing things; they’re about optimizing your home’s performance and extending its lifespan.
Anúncios
So, grab your notepad, put on your work clothes, and get ready to transform your approach to home care. By the time spring 2026 officially rolls around, you’ll be able to relax and enjoy the season, knowing that your home is in tip-top shape, thanks to your diligent DIY home maintenance efforts. Let’s get started on these essential hacks that will make a world of difference.
Hack 1: Gutter and Downspout Overhaul – The Drainage Defense
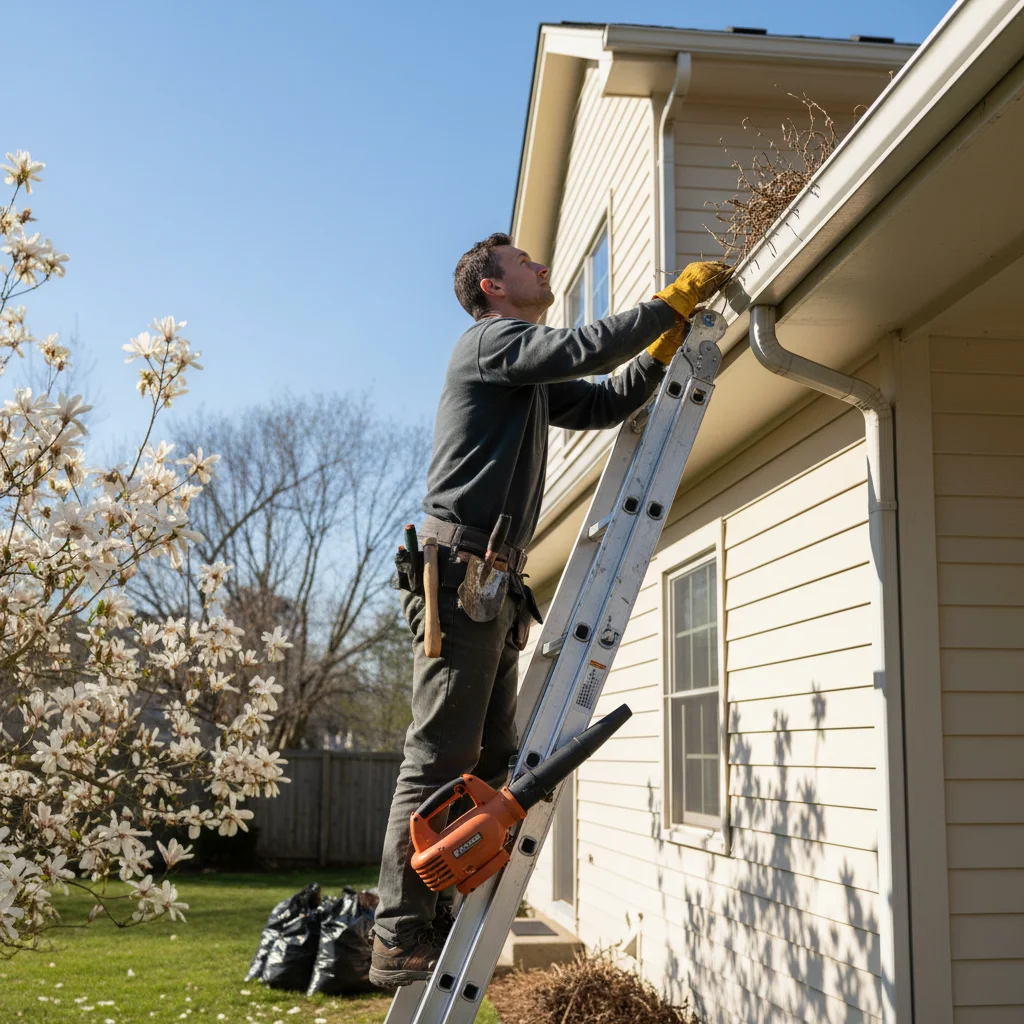
One of the most critical, yet often overlooked, aspects of DIY home maintenance is the regular inspection and cleaning of your gutters and downspouts. These seemingly simple components play a vital role in protecting your home from water damage. Their primary function is to channel rainwater away from your roof, walls, and foundation. When gutters become clogged with leaves, twigs, and other debris, they can’t perform this function effectively, leading to a cascade of potential problems.
Why it’s crucial: Clogged gutters can cause water to overflow, leading to several serious issues. This overflowing water can seep under roof shingles, causing rot and leaks in your attic or ceilings. It can also run down the side of your house, damaging siding, window frames, and exterior paint. More significantly, it can pool around your home’s foundation, leading to cracks, basement flooding, and costly structural damage. In colder climates, standing water in gutters can freeze, expand, and put immense stress on the gutter system itself, causing it to pull away from the fascia board.
The DIY home maintenance solution:
- Safety First: Before you even think about climbing a ladder, ensure it’s sturdy and placed on level ground. Have someone spot you if possible. Wear sturdy gloves to protect your hands from sharp debris and potential pests.
- Clear the Debris: Manually remove large clumps of leaves, twigs, and other gunk from the gutters. A small trowel or a gutter scoop can be helpful. For stubborn debris, a leaf blower can sometimes clear it out, but often a good old-fashioned hand-scoop is best.
- Flush with Water: Once the major debris is gone, use a garden hose to flush water through the gutters and downspouts. Watch closely to ensure water flows freely through the entire system and exits smoothly from the downspout at ground level. If you see water backing up or overflowing, it indicates a clog further down the downspout.
- Address Downspout Clogs: If a downspout is clogged, try flushing it again with a strong stream of water from the top. If that doesn’t work, you might need to use a plumber’s snake or disassemble sections of the downspout to clear the blockage.
- Check for Damage: While you’re up there, inspect the gutters for any signs of damage such as cracks, holes, sagging sections, or loose fasteners. Repair minor issues with gutter sealant or by re-securing loose hangers.
- Consider Gutter Guards: For long-term prevention, consider installing gutter guards. While they aren’t completely maintenance-free, they significantly reduce the frequency of cleaning.
Performing this DIY home maintenance task twice a year – once in late fall after leaves have fallen and again in early spring – will dramatically reduce your risk of water-related damage and save you from expensive repairs. It’s an investment of a few hours that pays dividends in home protection.
Hack 2: HVAC Filter Replacement and Basic System Check – Breathing Easy and Saving Energy
Your heating, ventilation, and air conditioning (HVAC) system is the lungs of your home, responsible for maintaining comfortable indoor temperatures and air quality. Neglecting its basic DIY home maintenance can lead to reduced efficiency, higher energy bills, and even premature system failure. Replacing your HVAC filter regularly is one of the easiest and most impactful tasks you can perform as a homeowner.
Why it’s crucial: A dirty HVAC filter restricts airflow, forcing your system to work harder to push air through. This increased strain not only drives up your energy consumption and utility bills but also reduces the lifespan of your HVAC unit. Furthermore, a clogged filter is less effective at trapping dust, allergens, and pollutants, leading to poorer indoor air quality and potential health issues for your family.
The DIY home maintenance solution:
- Locate Your Filter: HVAC filters are usually found in the return air vent, in the furnace itself, or in the air handler unit. If you’re unsure, consult your owner’s manual.
- Note the Size and Type: Filters have a size printed on their frame (e.g., 20x25x1). Also, consider the MERV rating (Minimum Efficiency Reporting Value). A higher MERV rating means better filtration but can also restrict airflow more, so check your system’s recommendations.
- Turn Off the System: Always turn off your thermostat or the power to your HVAC unit before changing the filter to prevent accidental activation and ensure safety.
- Remove the Old Filter: Note the direction of the airflow arrow on the old filter and insert the new filter in the same direction.
- Insert the New Filter: Slide the new filter into place, ensuring it fits snugly.
- Basic System Check: While you’re at it, perform a quick visual inspection:
- Outdoor Unit: Clear away any debris, leaves, or vegetation from around your outdoor condenser unit. Ensure there’s at least two feet of clearance on all sides for optimal airflow.
- Indoor Vents: Check that all supply and return air vents inside your home are open and not blocked by furniture or drapes.
- Thermostat Settings: Ensure your thermostat is set correctly for the upcoming season. Consider programming it for energy savings when you’re away or asleep.
Most experts recommend replacing your HVAC filter every 1-3 months, depending on factors like pet ownership, allergies, and local air quality. This simple DIY home maintenance task will not only improve your home’s air quality but also significantly cut down on your energy costs and extend the life of your expensive HVAC system. It’s a win-win for your wallet and your well-being.
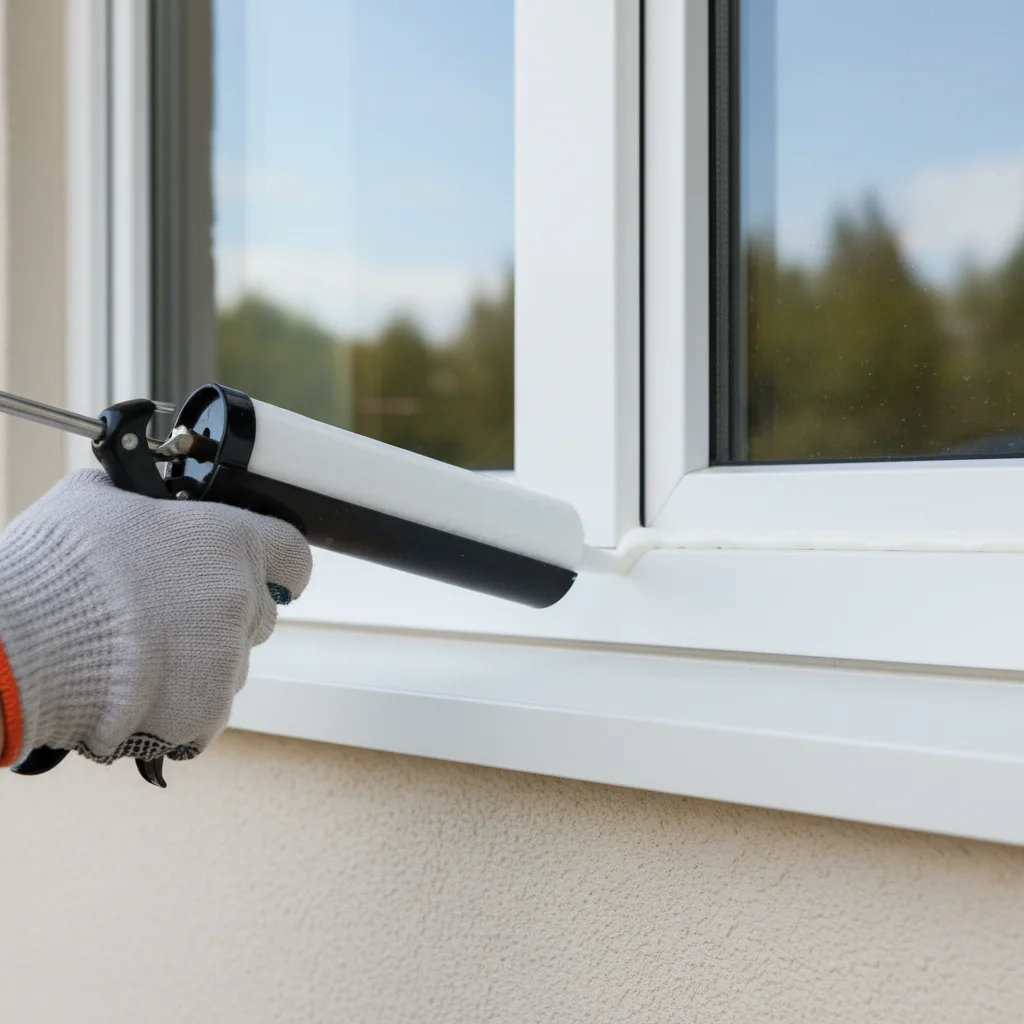
Hack 3: Seal and Caulk for Energy Efficiency – Blocking Out the Elements
Drafts and air leaks are silent energy thieves, allowing conditioned air to escape and unconditioned air to infiltrate your home. This forces your heating and cooling systems to work harder, leading to higher utility bills. Addressing these leaks through proper sealing and caulking is a fundamental DIY home maintenance hack that offers immediate and tangible benefits.
Why it’s crucial: Air leaks can account for a significant portion of your home’s energy loss. Gaps around windows, doors, electrical outlets, and plumbing penetrations act like small holes in a bucket, constantly draining your energy dollars. Beyond energy waste, these leaks can also allow moisture, pests, and outdoor noise to enter your home, compromising comfort and potentially causing damage.
The DIY home maintenance solution:
- Identify Air Leaks:
- The Hand Test: On a windy day, slowly move your hand around windows, doors, electrical outlets, and switch plates to feel for drafts.
- Incense Test: Light an incense stick and hold it near suspected leak areas. If the smoke wavers or is drawn inward/outward, you’ve found a leak.
- Visual Inspection: Look for visible gaps or cracks around window and door frames, utility penetrations (pipes, wires), and where different building materials meet.
- Caulking Gaps (Stationary Elements):
- Choose the Right Caulk: Acrylic latex caulk is good for general interior use and can be painted. Silicone caulk is more durable and flexible, ideal for exterior use and areas exposed to moisture.
- Prepare the Surface: Clean the area thoroughly, removing old caulk, dirt, and paint chips. A caulk removal tool can be very helpful.
- Apply Caulk: Cut the tip of the caulk tube at a 45-degree angle, making an opening appropriate for the gap size. Apply steady pressure as you move the caulk gun, creating a continuous bead. Smooth the bead with a wet finger or a caulking tool for a professional finish.
- Weatherstripping Gaps (Moving Elements):
- Choose the Right Weatherstripping: There are various types, including adhesive-backed foam, V-strip (tension seal), and rubber gaskets. Select the type appropriate for your doors and windows.
- Prepare the Surface: Clean the door or window frame where the weatherstripping will be applied, ensuring it’s free of dirt and grease.
- Apply Weatherstripping: Measure and cut the weatherstripping to fit. Apply it firmly, ensuring a tight seal when the door or window is closed.
Focus on sealing around windows, doors, and any penetrations in your home’s exterior envelope. This DIY home maintenance task is relatively inexpensive and can provide a quick return on investment through reduced energy bills, improved indoor comfort, and better protection against the elements. Make it a regular part of your pre-spring routine.
Hack 4: Inspecting and Winterizing Outdoor Faucets and Sprinkler Systems – Preventing Burst Pipes
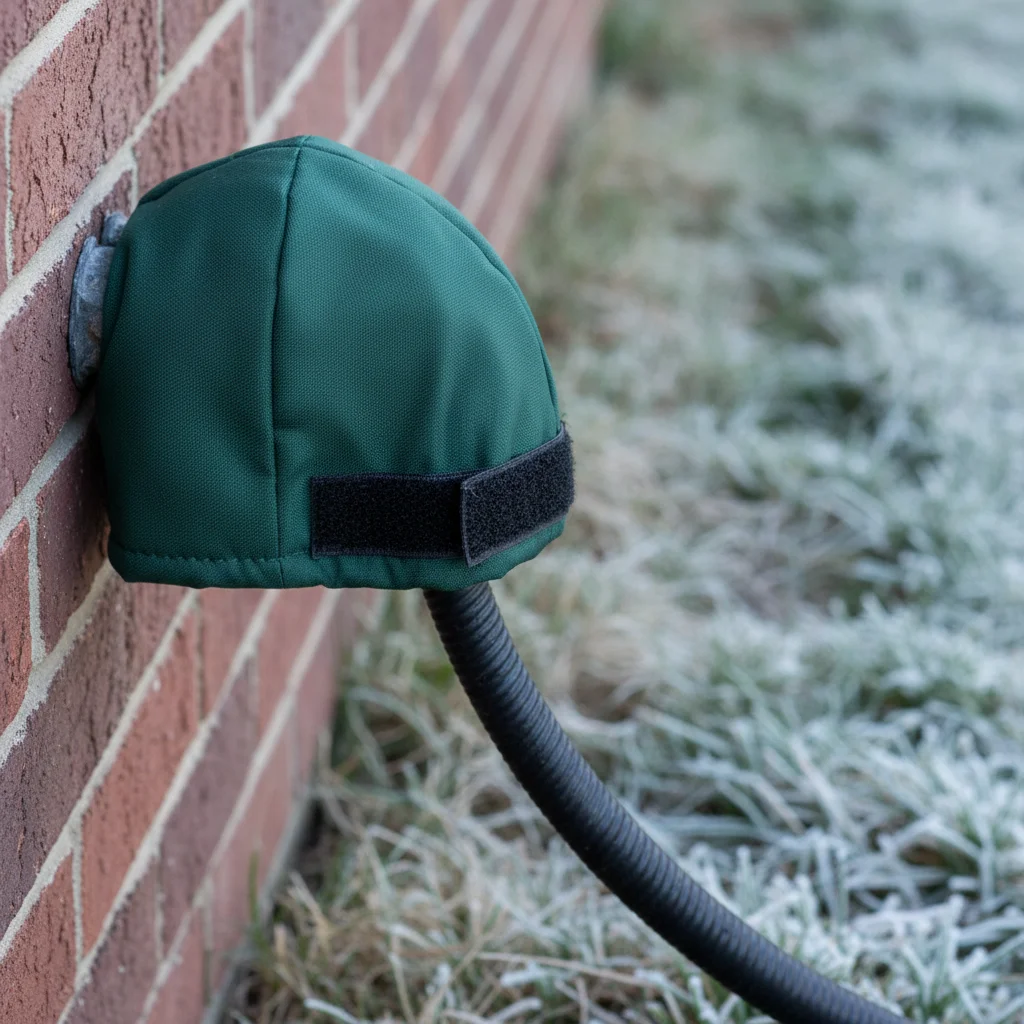
As winter gives way to spring, it’s crucial to ensure your outdoor plumbing was properly prepared for freezing temperatures, and to get it ready for active use again. Neglecting this aspect of DIY home maintenance can lead to burst pipes, which are among the most damaging and costly home repairs. Even if you think you winterized correctly, a quick check before spring is always a good idea.
Why it’s crucial: Water expands when it freezes. If water is left in your outdoor faucets, pipes leading to them, or your sprinkler system during freezing temperatures, this expansion can cause pipes to burst. A burst pipe can lead to significant water damage inside your walls, foundation, or basement, requiring extensive and expensive repairs, not to mention the potential for mold growth.
The DIY home maintenance solution:
- Disconnect Hoses: If you haven’t already, disconnect all garden hoses from outdoor spigots. Leaving them connected can trap water in the faucet, increasing the risk of freezing and bursting.
- Shut Off Water Supply: Locate the shut-off valve for your outdoor faucets, usually found inside your home near where the pipe exits the wall. Turn this valve to the “off” position.
- Drain the Faucet: Go back outside and open the outdoor faucet. Allow any residual water to drain completely. If your faucet has a bleeder valve, open that as well to ensure all water is expelled.
- Insulate Exposed Pipes: For outdoor faucets or pipes that are exposed to the elements, consider adding foam pipe insulation. This provides an extra layer of protection against freezing temperatures.
- Sprinkler System Winterization (If Applicable):
- Manual Drain Valves: Many older sprinkler systems have manual drain valves at the lowest points of the system. Open these to allow water to drain out.
- Automatic Drain Valves: Some systems have automatic drain valves that open when the pressure drops.
- Blow Out Method (Professional Recommended): The most thorough method, especially for systems in cold climates, is to use an air compressor to blow all water out of the lines. This is usually best left to a professional to avoid damaging your system with improper air pressure. However, understanding this step is part of comprehensive DIY home maintenance knowledge.
- Controller Shutdown: Turn off your sprinkler system controller for the winter.
- Pre-Spring Inspection and Activation:
- Inspect for Damage: Before reactivating, visually inspect all outdoor faucets and sprinkler heads for any signs of cracks or damage that might have occurred over winter.
- Gradual Reactivation: Once freezing temperatures are definitively past, slowly turn the indoor shut-off valve back on for your outdoor spigots. Check for leaks.
- Sprinkler System Startup: If you had a professional winterize, have them reactivate and check for leaks. If you did it yourself, slowly open the main water supply to your sprinkler system and check all zones for proper function and leaks.
This critical DIY home maintenance task is often overlooked until it’s too late. Taking the time to properly winterize and then inspect your outdoor plumbing will save you from the headache and expense of burst pipes and water damage. It’s a small effort for significant peace of mind.
Beyond the Hacks: Cultivating a Proactive DIY Home Maintenance Mindset
While these four hacks are essential for preparing your home for spring 2026 and preventing costly repairs, the true secret to long-term home health lies in adopting a proactive DIY home maintenance mindset. It’s not just about tackling a checklist once or twice a year; it’s about making regular inspections and minor upkeep a consistent part of your routine. Think of your home as a living entity that benefits from continuous care and attention.
The Benefits of a Proactive Approach:
- Significant Cost Savings: As we’ve emphasized, addressing small issues early almost always costs less than repairing major damage. A leaky faucet is a minor fix; water damage from that leak can cost thousands.
- Increased Home Value: A well-maintained home retains its value better and is more attractive to potential buyers should you decide to sell. Buyers appreciate a home that shows signs of consistent care.
- Enhanced Safety: Regular checks can uncover potential hazards like faulty wiring, gas leaks (though these require professional attention), or structural weaknesses before they become dangerous.
- Improved Comfort and Efficiency: A properly maintained home is more comfortable, with consistent temperatures and better indoor air quality. It also operates more efficiently, saving you money on utility bills.
- Peace of Mind: Knowing that your home is in good condition and that you’ve taken steps to prevent problems provides invaluable peace of mind.
Tips for Sustaining Your DIY Home Maintenance Efforts:
- Create a Seasonal Checklist: Develop a customized DIY home maintenance checklist for each season. This helps you remember what needs to be done and when.
- Schedule Reminders: Use your phone, calendar, or a digital assistant to set recurring reminders for tasks like changing HVAC filters or cleaning gutters.
- Invest in Basic Tools: You don’t need a professional workshop, but a basic toolkit with essentials like a ladder, caulk gun, screwdriver set, pliers, and a tape measure will make most DIY home maintenance tasks much easier.
- Educate Yourself: Don’t be afraid to learn new skills. There are countless online resources, videos, and books available to guide you through almost any home repair.
- Know When to Call a Professional: While DIY home maintenance is empowering, it’s also crucial to recognize your limitations. For complex electrical, plumbing, roofing, or structural issues, always consult a qualified professional. Attempting a repair beyond your skill level can be dangerous and lead to even costlier damage.
- Document Your Work: Keep a record of the maintenance you perform, including dates, materials used, and any issues you observed. This can be helpful for future reference and for tracking your home’s history.
The Long-Term Impact of DIY Home Maintenance
Embracing these DIY home maintenance hacks and adopting a proactive approach will transform your relationship with your home. You’ll move from a state of anxiety about potential problems to one of confident stewardship. The small efforts you put in now will compound over time, leading to a home that is safer, more comfortable, more energy-efficient, and ultimately, a better investment.
Preparing for spring 2026 isn’t just about cleaning; it’s about fortifying your home against the elements and the wear and tear of daily life. By mastering these four essential DIY home maintenance hacks – overhauling your gutters, regularly replacing HVAC filters, sealing air leaks, and properly winterizing outdoor plumbing – you are taking significant steps to prevent costly repairs and ensure your home remains a haven for years to come. Start today, and enjoy the peace of mind that comes with a well-maintained home.


