
Are you constantly battling stubborn soap scum, water spots, and mildew in your shower? Do you dream of a sparkling clean bathroom without hours of scrubbing? You’re not alone. Maintaining a pristine shower can feel like an endless chore, but what if we told you there are revolutionary shower cleaning hacks that can transform your routine and leave your shower gleaming with minimal effort? Say goodbye to harsh chemicals and endless scrubbing, and hello to a fresh, inviting bathroom.
In this comprehensive guide, we’ll dive deep into the world of effective shower cleaning, offering you an arsenal of tips, tricks, and product recommendations. From natural, eco-friendly solutions to advanced techniques, we’ve got everything you need to conquer even the most challenging shower grime. Get ready to discover the secrets to a perpetually clean shower, making your bathroom a true sanctuary.
Anúncios
Understanding the Enemy: What is Soap Scum and Why is it So Stubborn?
Before we can effectively combat shower grime, it’s crucial to understand what we’re up against. The primary culprit in most showers is soap scum, a frustrating residue formed when the fatty acids in soap react with the minerals (calcium and magnesium) present in hard water. This chemical reaction creates an insoluble film that adheres to surfaces like tiles, glass, and chrome, becoming progressively harder to remove over time.
Anúncios
Hard water is a significant contributor to soap scum buildup. If you live in an area with hard water, you’ll notice white, chalky deposits not just in your shower but also on faucets and showerheads. These mineral deposits, combined with soap residue, create a formidable layer that can dull surfaces and harbor mildew. Understanding this chemical interaction is the first step in devising effective shower cleaning hacks.
Beyond soap scum, showers are also breeding grounds for mildew and mold, especially in poorly ventilated spaces. These fungi thrive in damp, warm environments, presenting not only an aesthetic problem but also potential health concerns. Tackling these issues requires a multi-faceted approach, combining preventive measures with powerful cleaning solutions. Our shower cleaning hacks will address all these common shower woes, ensuring a holistic cleaning strategy.
The Power of Prevention: Daily Habits for a Cleaner Shower
The best defense is a good offense, and when it comes to shower cleaning, prevention is key. Incorporating a few simple daily habits can drastically reduce the amount of deep cleaning required, making your life much easier. These preventive shower cleaning hacks are simple to implement and yield significant results.
Squeegee After Every Use
This might seem like a small step, but it’s arguably one of the most effective. A quick squeegee of your shower walls and glass doors after every shower can prevent water spots and soap scum from forming. Water droplets are the carriers of minerals and soap residue; removing them before they dry eliminates the problem at its source. Keep a squeegee hanging conveniently inside your shower for easy access. This daily habit will save you hours of scrubbing in the long run.
Ventilation is Your Friend
Moisture is the enemy when it comes to mold and mildew. Always run your bathroom fan during and for at least 15-20 minutes after showering. If you don’t have a fan, open a window to allow steam to escape. Proper ventilation helps dry out the shower surfaces, making it difficult for mold and mildew to take hold. This simple act is one of the most underrated shower cleaning hacks for maintaining a healthy shower environment.
Quick Rinse and Wipe
After your shower, take an extra 30 seconds to quickly rinse down the walls and floor with fresh water. This washes away any lingering soap residue before it has a chance to dry and form scum. A quick wipe-down with a microfiber cloth can further enhance this effect, leaving surfaces drier and cleaner. These small, consistent efforts are what make the biggest difference in reducing the frequency of deep cleans.
Consider a Daily Shower Spray
Many commercial and homemade daily shower sprays are designed to prevent soap scum and mildew buildup. These sprays typically contain ingredients that break down soap residue and inhibit mold growth. A quick spritz after each shower can work wonders. We’ll discuss some DIY options later in this guide as part of our natural shower cleaning hacks.
Natural Shower Cleaning Hacks: Eco-Friendly and Effective
For those who prefer to avoid harsh chemicals, the good news is that many natural ingredients are incredibly effective at tackling shower grime. These eco-friendly shower cleaning hacks are safe for your family, pets, and the environment, proving that you don’t need industrial-strength cleaners for a sparkling result.
The Vinegar and Dish Soap Power Duo
This is perhaps the most celebrated natural shower cleaner, and for good reason. White vinegar is acidic, making it excellent at dissolving mineral deposits and soap scum, while dish soap (especially brands like Dawn) is a powerful degreaser that cuts through grime. Together, they form a formidable cleaning agent.
How to use it:
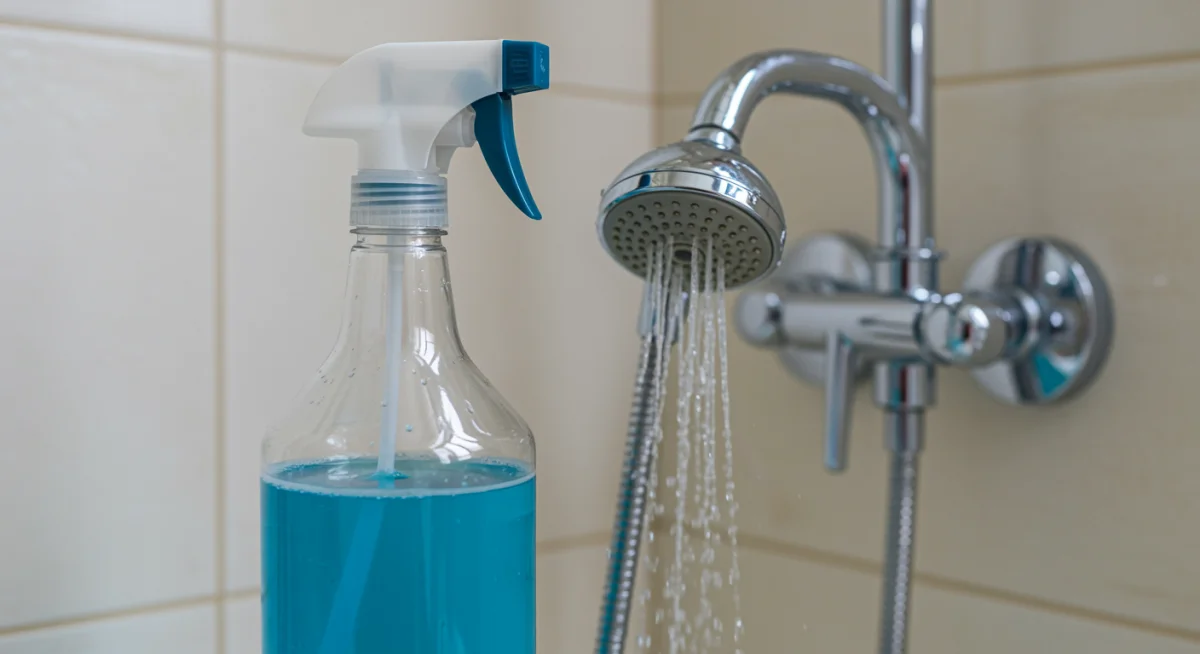
- Mix equal parts white vinegar and liquid dish soap in a spray bottle. For example, 1 cup vinegar and 1 cup dish soap.
- Gently warm the vinegar in the microwave for about 30 seconds before mixing (do not boil, as the fumes can be strong). This helps the mixture emulsify better and enhances its cleaning power.
- Spray the solution generously onto all shower surfaces, including tiles, grout, glass doors, and fixtures.
- Let it sit for at least 30 minutes, or up to several hours for heavily soiled areas. The longer it sits, the more it breaks down the grime.
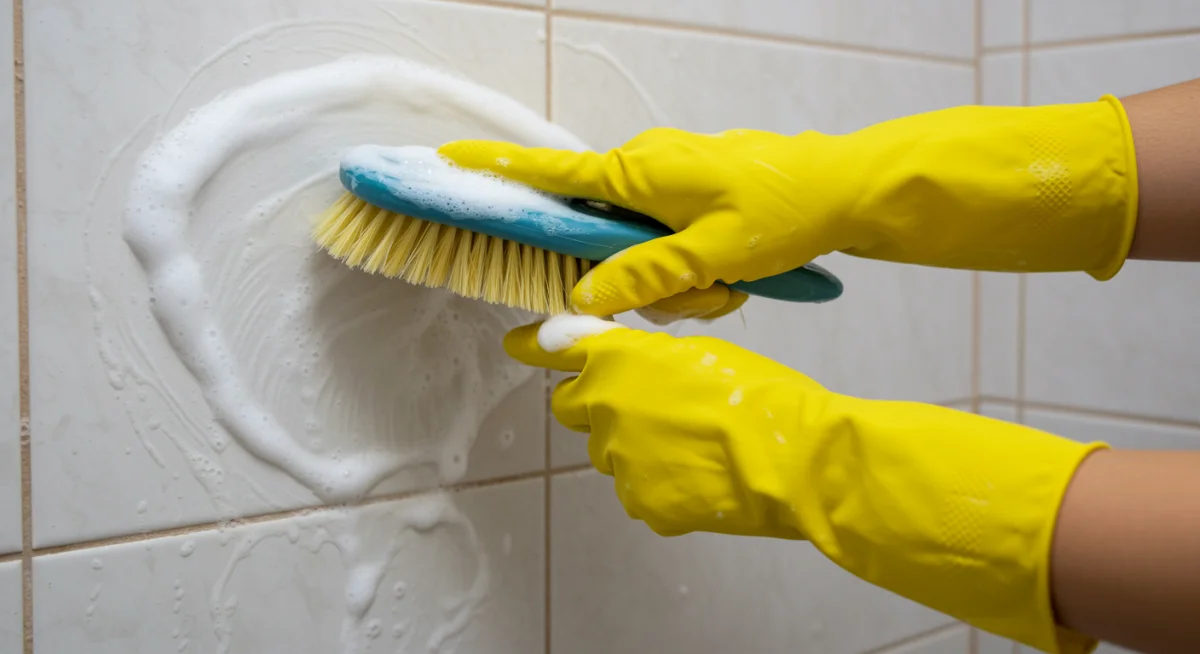
- Scrub with a non-abrasive brush or sponge.
- Rinse thoroughly with warm water.
- Wipe dry with a microfiber cloth for a streak-free shine.
This mixture is one of the most potent shower cleaning hacks for dissolving stubborn soap scum and hard water stains.
Baking Soda for Scouring and Whitening
Baking soda (sodium bicarbonate) is a mild abrasive and a natural deodorizer. It’s excellent for scouring tough stains and whitening grout without scratching surfaces.
How to use it:
- For general scrubbing: Sprinkle baking soda directly onto a damp sponge or brush and scrub surfaces, especially grout lines and textured floors.
- For a paste: Mix baking soda with a small amount of water to create a thick paste. Apply this paste to heavily stained areas, let it sit for 15-30 minutes, then scrub and rinse.
- Combined with vinegar: For an extra boost, spray vinegar over the baking soda paste. The fizzing action helps lift grime. Just be aware that the fizzing neutralizes some of the acidity of the vinegar, so it’s often more effective to use them sequentially rather than mixed for maximum impact on different types of stains.
Baking soda is a versatile component of many effective shower cleaning hacks.
Lemon Juice for Shine and Freshness
Lemon juice is another natural acid that can help dissolve mineral deposits and leave a fresh scent. It’s particularly good for polishing chrome fixtures and adding a sparkle to glass.
How to use it:
- Mix lemon juice with an equal part of water in a spray bottle.
- Spray onto chrome fixtures and glass, let sit for 10 minutes, then wipe clean with a microfiber cloth.
- For tougher spots, you can make a paste with lemon juice and baking soda.
Adding lemon juice to your routine is a refreshing addition to your shower cleaning hacks.
Advanced Shower Cleaning Techniques for Stubborn Grime
Sometimes, even the best natural remedies need a little help, especially when dealing with years of buildup. These advanced shower cleaning hacks employ more targeted approaches and tools to tackle the most challenging shower problems.
Steam Cleaning Power
A handheld steam cleaner can be a game-changer for shower cleaning. The high-temperature steam not only sanitizes but also loosens tough grime, soap scum, and mildew without the need for chemicals. It’s particularly effective on grout lines and hard-to-reach corners.
How to use it:
- Fill the steam cleaner with distilled water.
- Direct the steam nozzle at soiled areas, moving slowly to allow the heat to penetrate.
- Wipe away loosened grime with a microfiber cloth.
- For very stubborn spots, follow up with a scrub brush.
Steam cleaning is an excellent chemical-free method among our shower cleaning hacks for deep sanitization.
Dealing with Grout: Restore its Original Luster
Grout lines are porous and easily accumulate dirt, soap scum, and mildew, often becoming discolored. Restoring them can dramatically improve the look of your entire shower.
Methods for grout cleaning:
- Baking Soda Paste: As mentioned, a thick baking soda paste applied to grout lines, left to sit, and then scrubbed with a stiff brush (an old toothbrush works wonders) is very effective.
- Oxygen Bleach (e.g., OxiClean): For heavily stained or moldy grout, mix oxygen bleach with water according to package directions to form a paste. Apply to grout, let sit for 15-30 minutes, scrub, and rinse thoroughly. Oxygen bleach is generally safer than chlorine bleach for colored grout and ventilation is still important.
- Grout Pen: For severely discolored grout that won’t come clean, a grout pen can be used to re-whiten or re-color the grout lines, offering a quick cosmetic fix.
- Grout Sealer: Once your grout is clean, consider applying a grout sealer. This creates a protective barrier that prevents moisture and grime from penetrating, making future cleaning much easier. This is a brilliant preventive shower cleaning hack.
Tackling Showerhead Clogs and Mineral Buildup
Hard water mineral deposits can clog showerhead nozzles, reducing water pressure and spray quality. This is a common issue that can be easily resolved.
How to clean a showerhead:
- Fill a plastic bag (like a Ziploc bag) with undiluted white vinegar.
- Secure the bag around the showerhead with a rubber band, ensuring the showerhead is completely submerged in the vinegar.
- Leave it to soak for a few hours, or overnight for severe buildup.
- Remove the bag and use an old toothbrush to scrub away any remaining loosened mineral deposits.
- Run hot water through the showerhead for a few minutes to flush out any remaining debris.
This simple trick is an essential part of comprehensive shower cleaning hacks.
Essential Tools for Your Shower Cleaning Arsenal
Having the right tools can make all the difference in making your shower cleaning routine efficient and effective. Invest in these items to elevate your shower cleaning hacks game:
- Squeegee: A high-quality squeegee is a non-negotiable for daily maintenance of glass doors and tiles.
- Microfiber Cloths: Excellent for streak-free drying, polishing, and general wiping. They absorb water and trap dirt effectively.
- Scrub Brush: A good scrub brush with stiff bristles is invaluable for tackling tough grout and textured surfaces.
- Old Toothbrush or Grout Brush: Perfect for detailed cleaning of grout lines and tight corners.
- Spray Bottles: Essential for mixing and applying homemade cleaning solutions.
- Non-Scratch Scouring Pads/Sponges: For scrubbing without damaging surfaces.
- Rubber Gloves: Protect your hands from cleaning solutions and grime.
- Extendable Cleaning Brush: For reaching high walls and ceilings without straining.
Special Considerations and Materials
Not all showers are created equal. Different materials require specific care to avoid damage. Keep these points in mind when applying your shower cleaning hacks.
Glass Shower Doors
Glass doors are prone to water spots and soap scum. The vinegar and dish soap solution is highly effective here. For an extra shine, after rinsing, buff with a dry microfiber cloth or a crumpled newspaper (the ink helps polish without streaking, though this is less common now with digital news). For persistent hard water stains, a mixture of equal parts vinegar and distilled water with a few drops of rubbing alcohol can work wonders. Some people also swear by car wax or rain-repellent products (like Rain-X) applied to glass doors to make water bead off, significantly reducing spots.
Tiled Showers (Ceramic, Porcelain, Natural Stone)
Ceramic and porcelain tiles are durable and can withstand most cleaning solutions. However, natural stone tiles (like marble, granite, travertine, slate) are porous and much more sensitive. Avoid acidic cleaners like vinegar or lemon juice on natural stone, as they can etch and dull the surface. Instead, use pH-neutral cleaners specifically designed for natural stone. For soap scum on natural stone, a mild dish soap solution and a soft brush are best. Regular sealing of natural stone tiles is also crucial for protection.
Acrylic and Fiberglass Showers
These surfaces are softer and more prone to scratching. Avoid abrasive cleaners, harsh brushes, and scouring pads. The vinegar and dish soap mixture is generally safe, but always test in an inconspicuous area first. For stubborn stains, a paste of baking soda and water is a gentler abrasive. Always rinse thoroughly to prevent residue buildup.
Chrome and Metal Fixtures
Chrome can be polished with lemon juice or a dedicated chrome cleaner. To remove hard water spots from chrome, wrap a cloth soaked in vinegar around the fixture for 30 minutes, then scrub and buff. Avoid abrasive cleaners that can scratch the finish. Regular drying after each use will keep chrome sparkling.
The Ultimate Deep Clean Routine for Your Shower
Even with daily maintenance, a deep clean every few weeks or months is essential to keep your shower in top condition. Here’s a step-by-step guide incorporating the best shower cleaning hacks:
Step 1: Clear the Clutter
Remove all bottles, sponges, loofahs, and anything else from your shower. This allows you to access all surfaces easily.
Step 2: Pre-Rinse with Hot Water
Turn on the shower to the hottest setting for a few minutes. The steam and hot water will help loosen grime and open up the pores of the tiles and grout, making subsequent cleaning more effective.
Step 3: Apply Your Chosen Cleaner
Based on your shower material and the type of grime, apply your chosen cleaning solution. For general all-purpose cleaning, the vinegar and dish soap mixture is highly recommended. Spray generously over all surfaces: walls, glass doors, floor, fixtures, and even the shower curtain (if it’s washable). For natural stone, use a pH-neutral cleaner.
Step 4: Let it Dwell
Allow the cleaner to sit and work its magic for at least 30 minutes, or longer for tough stains. This dwell time is crucial as it allows the cleaning agents to break down soap scum and mineral deposits. Resist the urge to start scrubbing immediately.
Step 5: Scrub Systematically
Starting from the top and working your way down, begin scrubbing. Use your scrub brush for tiles and grout, an old toothbrush for intricate areas, and a non-abrasive sponge for glass and fixtures. Apply elbow grease where needed, but let the cleaner do most of the heavy lifting. Pay extra attention to grout lines, corners, and areas prone to mildew.
Step 6: Rinse Thoroughly
Once scrubbing is complete, rinse all surfaces thoroughly with warm water, again working from top to bottom. Ensure all cleaning solution residue is washed away. You can use a detachable showerhead for better rinsing control.
Step 7: Squeegee and Dry
Immediately after rinsing, squeegee all glass and tiled surfaces to remove excess water. Follow up by wiping down all surfaces with a clean, dry microfiber cloth. This step is critical for preventing new water spots and streaks and achieving a sparkling finish. Buff chrome fixtures to a shine.
Step 8: Replace Items and Enjoy
Put your shower items back in their place, perhaps wiping down bottles as you do. Step back and admire your sparkling clean shower! This deep clean, combined with daily preventive shower cleaning hacks, will keep your bathroom looking its best.
Troubleshooting Common Shower Cleaning Challenges
Even with the best shower cleaning hacks, you might encounter specific challenges. Here’s how to address them:
Persistent Mildew and Mold
If mildew persists after cleaning, a mild bleach solution (1 part bleach to 10 parts water) can be used on non-porous surfaces like ceramic tile and acrylic, but always ensure excellent ventilation and test in an inconspicuous area first. For natural alternatives, hydrogen peroxide (3%) sprayed directly on mildew, left for 10-15 minutes, then scrubbed and rinsed, can be effective. Improving ventilation is the long-term solution.
Rust Stains
Rust stains, often from metal cans or hard water, can be tough. Lemon juice and salt paste can work on mild rust. For tougher stains, a commercial rust remover (like CLR – Calcium, Lime, & Rust Remover) may be necessary, but always follow product instructions carefully and test first.
Scratches on Acrylic/Fiberglass
Minor scratches on acrylic or fiberglass can sometimes be buffed out with a non-abrasive polishing compound designed for these materials. Always follow the product’s instructions.
The Long-Term Benefits of Consistent Shower Cleaning Hacks
Adopting these shower cleaning hacks isn’t just about having a clean shower today; it’s about investing in the longevity and aesthetics of your bathroom. Regular cleaning prevents the buildup of grime that can lead to permanent staining and deterioration of surfaces. It also creates a healthier environment by minimizing mold and mildew growth, which can trigger allergies and respiratory issues.
Furthermore, a consistently clean shower enhances your daily routine. Stepping into a fresh, sparkling shower can be a small luxury that improves your mood and overall well-being. It transforms a functional space into a personal oasis. By incorporating these tips, you’ll spend less time deep cleaning and more time enjoying a pristine bathroom.
Conclusion: Your Path to a Sparkling Shower
Conquering shower grime doesn’t have to be a daunting task. By understanding the causes of soap scum and mildew, implementing daily preventive measures, and utilizing a combination of natural and advanced shower cleaning hacks, you can maintain a beautifully clean shower with surprising ease. Remember the power of prevention with squeegees and ventilation, harness the cleaning might of vinegar and baking soda, and don’t shy away from specialized tools for those stubborn challenges.
With consistency and the right approach, your shower will no longer be a source of cleaning anxiety but a testament to your effective home maintenance skills. Embrace these strategies, and enjoy the refreshing experience of a truly sparkling clean shower, every single day. Your bathroom, and your peace of mind, will thank you.


