Upcycling Your Home: 7 Creative DIY Projects for a Fresh Look in 2026
Anúncios
Upcycling Your Home: 7 Creative DIY Projects for a Fresh Look in 2026
Are you looking to inject new life into your home without draining your wallet? Do you dream of a living space that reflects your unique personality and values? Then welcome to the wonderful world of DIY Home Upcycling! In 2026, the trend of transforming old, unused, or discarded items into beautiful and functional pieces for your home is more popular and relevant than ever. Not only does DIY Home Upcycling save you money, but it also promotes sustainability, reduces waste, and allows you to create truly one-of-a-kind decor that tells a story.
Anúncios
The beauty of DIY Home Upcycling lies in its limitless possibilities. Almost anything can be given a second life with a little creativity, effort, and the right tools. From forgotten furniture pieces gathering dust in your attic to everyday household items destined for the recycling bin, every object holds potential. This comprehensive guide will walk you through seven creative DIY Home Upcycling projects that are perfect for refreshing your home’s aesthetic in 2026. Get ready to unleash your inner artist and transform your space!
Anúncios
Why Embrace DIY Home Upcycling in 2026?
Before we dive into the exciting projects, let’s understand why DIY Home Upcycling is such a powerful and rewarding endeavor, especially in today’s world:
- Sustainability: Upcycling is a cornerstone of sustainable living. By repurposing items, you divert waste from landfills, reduce the demand for new products, and conserve natural resources. It’s a tangible way to lessen your environmental footprint.
- Cost-Effectiveness: Let’s face it, home decor can be expensive. DIY Home Upcycling allows you to achieve high-end looks for a fraction of the cost. You’re leveraging existing materials, often acquired for free or very cheaply, and investing your time and creativity instead of large sums of money.
- Uniqueness and Personalization: Mass-produced items often lack character. Upcycled pieces are inherently unique. They carry a history and, once transformed by your hands, tell a personal story. Your home will reflect your individual style, making it truly yours.
- Skill Development: Engaging in DIY Home Upcycling projects helps you develop new skills, from painting and sanding to basic carpentry and upholstery. These skills are not only useful for upcycling but can also be applied to other areas of home improvement.
- Creative Outlet: For many, upcycling is a therapeutic and enjoyable creative outlet. It allows you to experiment with colors, textures, and designs, turning abstract ideas into tangible beauty.
Project 1: The Vintage Dresser Revamp
A classic piece of furniture, a vintage dresser, often found at thrift stores, garage sales, or even inherited, holds immense potential for DIY Home Upcycling. Instead of seeing scratches and outdated finishes, envision a blank canvas.
What You’ll Need:
- Old dresser
- Sandpaper (various grits: 80, 120, 220)
- Primer
- Paint (chalk paint, milk paint, or latex paint)
- Paintbrushes or rollers
- New hardware (knobs, pulls) – optional but highly recommended
- Protective topcoat (polyurethane, wax)
- Drop cloths, painter’s tape, cleaning supplies
Steps for Your DIY Home Upcycling Dresser:
- Clean and Prep: Thoroughly clean the dresser, removing all dust and grime. Remove existing hardware.
- Sand: Lightly sand the entire surface to create a good adhesion for the paint. Start with a coarser grit for rough areas and finish with a finer grit for smoothness. Wipe away sanding dust.
- Prime: Apply a thin, even coat of primer. This step is crucial, especially if you’re painting a dark piece light or want to prevent bleed-through from old finishes.
- Paint: Once the primer is dry, apply your chosen paint. Depending on the paint type and desired finish, you might need two or three thin coats. Allow each coat to dry completely.
- Distress (Optional): For a shabby-chic look, lightly sand edges and raised details to reveal the wood or previous paint layer underneath.
- Seal: Apply a protective topcoat to ensure durability. Wax creates a softer finish, while polyurethane offers stronger protection.
- Add Hardware: Install new, stylish knobs or pulls to complete the transformation. This small detail can dramatically change the dresser’s look.
This DIY Home Upcycling project can turn a forgotten piece into a stunning focal point for a bedroom, living room, or entryway.
Project 2: Reclaimed Wood Shelving
Reclaimed wood offers rustic charm and an eco-friendly touch. Creating shelves from old pallets, barn wood, or even discarded fence panels is an excellent DIY Home Upcycling endeavor.
What You’ll Need:
- Reclaimed wood boards
- Sandpaper
- Wood stain or sealant (optional)
- Brackets or floating shelf hardware
- Drill, screws, level, stud finder
Steps:
- Source and Clean: Find sturdy reclaimed wood. Clean it thoroughly, removing any nails, staples, or debris.
- Cut to Size: Measure and cut your boards to the desired shelf length.
- Sand Smooth: Sand the wood to remove splinters and smooth the surface. You can choose to leave some imperfections for character.
- Finish (Optional): Apply a wood stain to enhance the grain or a clear sealant for protection.
- Install: Use a stud finder to locate studs in your wall for secure mounting. Attach your chosen brackets or floating shelf hardware to the wall, ensuring they are level.
- Mount Shelves: Securely attach the reclaimed wood boards to the installed hardware.
These shelves are perfect for showcasing books, plants, or decorative items, adding warmth and character through DIY Home Upcycling.
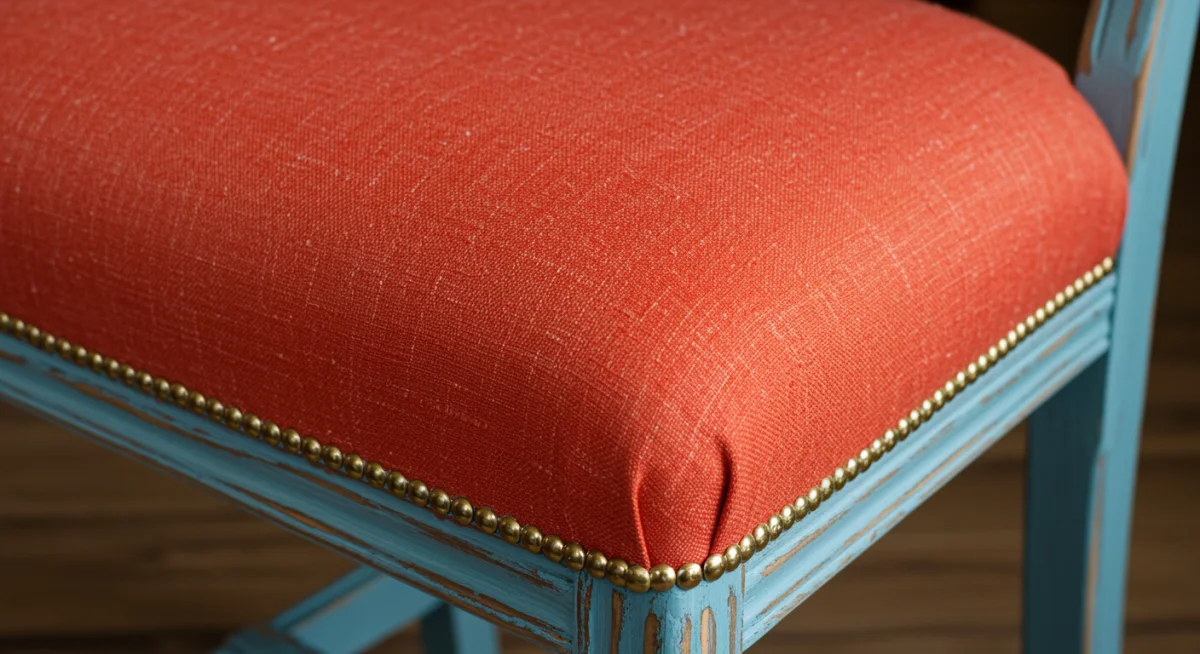
Project 3: Upholstered Ottoman from Old Tires
Believe it or not, old tires can be transformed into stylish and functional ottomans or footstools. This is a truly innovative DIY Home Upcycling project that addresses a significant waste problem.
What You’ll Need:
- One old car tire (cleaned thoroughly)
- Two circular pieces of plywood (cut to fit the tire’s diameter)
- Rope (jute, sisal, or synthetic)
- Hot glue gun and plenty of glue sticks
- Drill and screws
- Fabric, foam, batting (for upholstered top – optional)
Steps:
- Clean Tire: Ensure the tire is meticulously clean and dry.
- Attach Plywood: Drillpilot holes into the tire sidewall and secure one plywood circle to the top of the tire using screws. Repeat for the bottom.
- Start Wrapping: Begin at the center of the top plywood circle. Apply hot glue and tightly coil the rope outwards, pressing firmly.
- Continue Wrapping: Continue coiling and gluing the rope around the tire’s sidewall, ensuring no gaps.
- Finish Bottom: Once you reach the bottom, wrap the rope around the edge of the bottom plywood circle to create a neat finish.
- Optional Upholstered Top: For extra comfort, you can create a removable upholstered cushion for the top. Cut foam and batting to the plywood size, cover with fabric, and secure.
This DIY Home Upcycling ottoman is durable, unique, and a fantastic conversation starter.
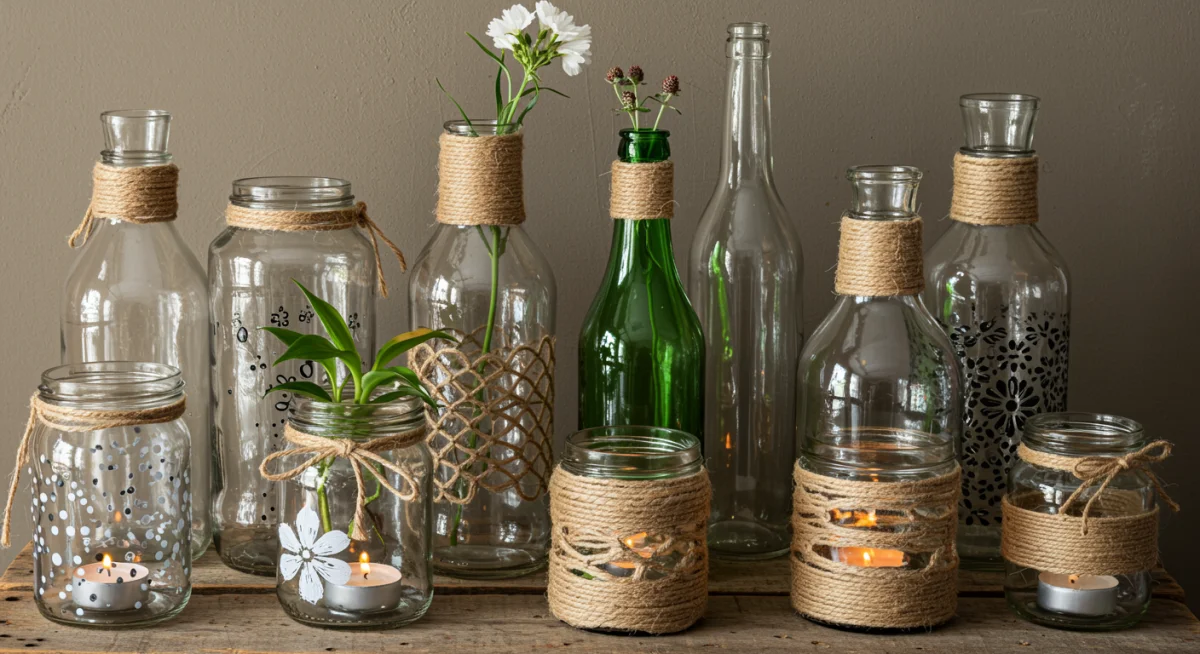
Project 4: Repurposed Glass Jar Decor
Don’t throw away those empty glass jars and bottles! They are prime candidates for easy and beautiful DIY Home Upcycling projects. From food jars to old wine bottles, the possibilities are endless.
What You’ll Need:
- Clean glass jars/bottles
- Paint (chalk paint, spray paint, glass paint)
- Twine, ribbon, lace
- Stencils, decorative elements
- LED fairy lights (battery operated)
- Sandpaper (for distressing paint)
Steps:
- Clean Thoroughly: Remove labels and wash jars/bottles. Ensure they are completely dry.
- Paint or Decorate:
- Option A (Painted Vases): Paint the jars in desired colors. You can distress them once dry for a rustic look. Use them as vases for fresh flowers or as decorative accents.
- Option B (Twine Wrapped): Apply hot glue and wrap twine, jute, or lace around the jars for a rustic or bohemian feel.
- Option C (Lanterns): Place battery-operated LED fairy lights inside painted or decorated jars for ambient lighting.
- Option D (Storage): Keep them clear for visible storage of pantry items, craft supplies, or bathroom essentials.
These simple DIY Home Upcycling ideas add charm and functionality to any room.
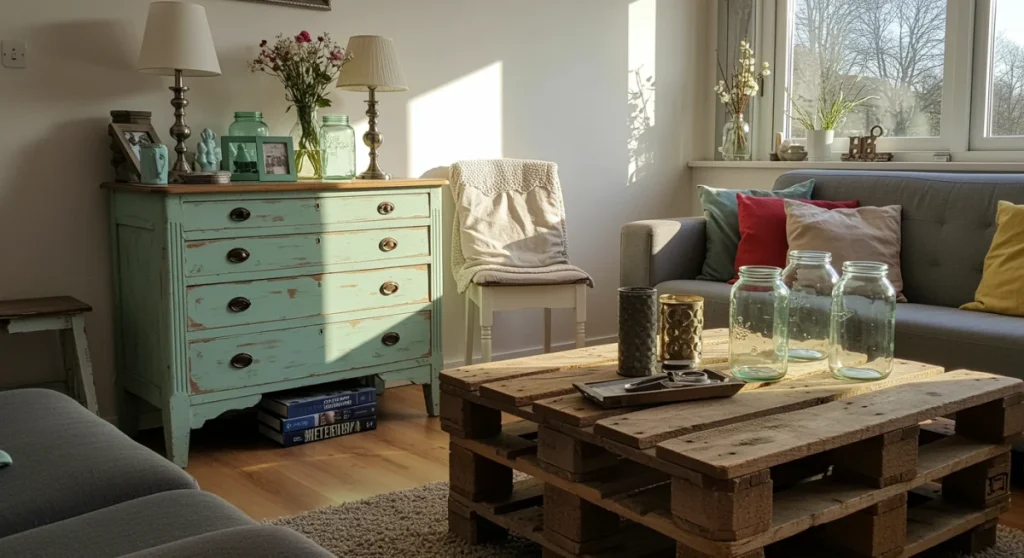
Project 5: Pallet Wood Coffee Table
Wooden pallets are a goldmine for DIY Home Upcycling enthusiasts. They are readily available, often free, and can be transformed into robust and stylish furniture, like a coffee table.
What You’ll Need:
- 2-3 clean, heat-treated (HT stamped) wooden pallets
- Saw (hand saw or power saw)
- Sander or sandpaper
- Wood screws, wood glue
- Casters (wheels) – optional
- Wood stain, paint, or clear sealant
- Protective gloves, safety glasses
Steps:
- Source and Inspect: Find pallets marked ‘HT’ (heat-treated) to avoid chemically treated ones. Thoroughly clean them and remove any protruding nails.
- Disassemble (if needed): Depending on your design, you might need to carefully disassemble pallets to get individual planks.
- Cut and Sand: Cut planks or sections of pallets to your desired coffee table dimensions. Sand all surfaces thoroughly to remove splinters and smooth the wood.
- Assemble Base: Stack two pallets on top of each other and secure them with wood screws. For a smoother top, you can add extra planks to cover the gaps.
- Add Functionality (Optional): Attach casters to the bottom for easy mobility.
- Finish: Apply wood stain to highlight the grain, paint for a modern look, or a clear sealant for a natural finish and protection.
A pallet coffee table is a fantastic example of functional DIY Home Upcycling that adds an industrial or rustic touch to your living room.
Project 6: Old Window Frame Gallery Wall
Discarded window frames, especially vintage ones with multiple panes, are beautiful architectural elements that can be repurposed into stunning gallery walls or decorative mirrors through DIY Home Upcycling.
What You’ll Need:
- Old window frames (various sizes and styles)
- Sandpaper
- Paint (chalk paint, spray paint)
- Cleaning supplies, protective gloves
- Pictures, mirrors, fabric, or decorative paper
- Strong adhesive or picture frame clips
- Wall hanging hardware
Steps:
- Clean and Prep: Carefully remove any old, loose glass (wear gloves and eye protection). Clean the frames thoroughly.
- Sand and Paint: Lightly sand the frames to prepare for paint. Paint them in a unifying color scheme or different complementary colors.
- Fill Panes:
- Option A (Photo Frames): Cut photos to fit the glass panes and secure them from behind.
- Option B (Mirrors): Have custom-cut mirrors inserted into the panes for a multi-panel mirror effect.
- Option C (Fabric/Paper): Glue decorative fabric or patterned paper behind each pane for a unique art piece.
- Option D (Empty Frames): Leave some panes empty to create a layered, architectural look.
- Hang: Arrange your revitalized window frames on a wall to create an eye-catching gallery display.
This DIY Home Upcycling project adds character and a sense of history to your walls.
Project 7: Tin Can Herb Garden or Desk Organizers
Everyday tin cans, once cleaned, are incredibly versatile for small-scale DIY Home Upcycling. They can be transformed into charming herb planters or practical desk organizers.
What You’ll Need:
- Empty tin cans (various sizes)
- Can opener (for smooth edges)
- Primer (metal specific)
- Paint (spray paint, acrylic paint)
- Paintbrushes, stencils, decorative elements
- Drill (for drainage holes in planters)
- Small plants/herb seeds or office supplies
Steps:
- Clean and Prepare: Remove labels, wash cans thoroughly, and ensure edges are smooth (use a safety can opener if possible).
- Prime: Apply a metal-specific primer to ensure paint adhesion and prevent rust.
- Paint and Decorate: Paint the cans in colors that match your decor. You can add stenciled designs, patterns, or wrap them with decorative paper/fabric.
- For Herb Garden: Drill a few small drainage holes in the bottom of each can. Fill with potting soil and plant your herbs or seeds.
- For Desk Organizers: Simply arrange them on your desk to hold pens, pencils, scissors, and other office supplies. You can even glue them together in a cluster.
This quick and easy DIY Home Upcycling project brings a touch of green or organization to your space.
Tips for Successful DIY Home Upcycling
To ensure your DIY Home Upcycling journey is smooth and rewarding, keep these tips in mind:
- Safety First: Always wear appropriate safety gear (gloves, eye protection, masks) when sanding, painting, or working with tools.
- Cleanliness is Key: Proper cleaning and preparation of your items before painting or finishing will make a huge difference in the final result.
- Patience: Allow paints and sealants to dry completely between coats. Rushing can lead to a less durable and aesthetically pleasing finish.
- Embrace Imperfections: Part of the charm of upcycling is the history an item carries. Don’t strive for factory perfection; embrace the unique character.
- Research Materials: Understand the type of material you’re working with (wood, metal, glass) and choose appropriate paints, primers, and adhesives.
- Start Small: If you’re new to DIY Home Upcycling, begin with smaller, less intimidating projects to build your confidence and skills.
- Seek Inspiration: Look at magazines, Pinterest, and blogs for ideas, but don’t be afraid to put your own spin on things.
- Don’t Be Afraid to Experiment: Some of the best upcycling ideas come from trial and error. What seems like a mistake can sometimes lead to a brilliant new design.
- Invest in Good Tools: You don’t need a workshop full of expensive tools, but a few quality basics (good sandpaper, brushes, a reliable drill) will make your projects much easier and more enjoyable.
- Consider Functionality: While aesthetics are important, make sure your upcycled piece is still functional and practical for its intended use.
- Think Outside the Box: A ladder can become a bookshelf, old suitcases can become side tables, and even old skateboards can be turned into shelves. The only limit is your imagination when it comes to DIY Home Upcycling.
- Community and Sharing: Join online communities or local workshops focused on upcycling. Sharing ideas and learning from others can be incredibly motivating and helpful.
- Sustainability Beyond the Project: Remember that upcycling is part of a larger sustainable lifestyle. Consider other eco-friendly practices in your home.
- Know When to Stop: Sometimes, a piece is beyond repair or requires too much effort for the desired outcome. It’s okay to let go of some items.
- Enjoy the Process: Upcycling should be fun! Savor the journey of transforming something old into something new and beautiful.
The Future of Home Decor: Sustainable and Personal
As we move further into 2026, the emphasis on sustainable living and personalized spaces continues to grow. DIY Home Upcycling perfectly aligns with these values, offering a pathway to a home that is both eco-conscious and deeply personal. It’s more than just decorating; it’s about mindful consumption, creative expression, and building a home that truly tells your story.
Each upcycled piece in your home is a testament to your creativity and your commitment to a more sustainable future. It’s a conversation starter, a unique focal point, and a reflection of your individual style. So, gather your tools, find some forgotten treasures, and embark on your next DIY Home Upcycling adventure. Your home, and the planet, will thank you for it.
Conclusion: Your Home, Upcycled and Inspired
From revitalizing a vintage dresser to transforming humble tin cans, these seven DIY Home Upcycling projects offer a diverse range of opportunities to refresh your home in 2026. Each project, regardless of its scale, contributes to a more sustainable lifestyle and allows you to infuse your living space with unparalleled character and charm. The satisfaction of creating something beautiful and functional from something discarded is immense, making DIY Home Upcycling a truly rewarding endeavor.
So, take inspiration from these ideas, but don’t be afraid to let your own creativity guide you. Look at everyday objects with new eyes, envisioning their potential. With a little effort and a lot of imagination, you can transform your home into a unique sanctuary filled with pieces that are not only aesthetically pleasing but also carry a story and a purpose. Start your DIY Home Upcycling journey today and discover the endless possibilities!


